The fridge looks fine until you open it on a hot Orlando afternoon and get hit with stale air, sticky drawer rails, and that sour smell that keeps coming back no matter how much you wipe. That's the point where most families reach for a sponge and a spray bottle, then wonder why the odor returns a week later.
A true how to deep clean refrigerator routine is not a quick wipe-down. It's a four-stage sanitation process, remove, wash, rinse, sanitize, with temperature control and food handling folded in so you're not just making the shelves shiny.
Table of Contents
- [Why a Wipe Down Is Not a Deep Clean](#why-a-wipe-down-is-not-a-deep-clean)
- [What deep clean really means](#what-deep-clean-really-means)
- [What professional cleaners are actually checking](#what-professional-cleaners-are-actually-checking)
- [Gather What You Need Before You Start](#gather-what-you-need-before-you-start)
- [Build a small, separate kit](#build-a-small-separate-kit)
- [Use the right chemicals, not the strongest ones](#use-the-right-chemicals-not-the-strongest-ones)
- [The Four-Stage Cleaning Sequence](#the-four-stage-cleaning-sequence)
- [Step 1 Remove and sort](#step-1-remove-and-sort)
- [Step 2 Wash the parts](#step-2-wash-the-parts)
- [Step 3 Rinse away the detergent](#step-3-rinse-away-the-detergent)
- [Step 4 Sanitize and dry](#step-4-sanitize-and-dry)
- [Cleaning Versus Sanitizing and How to Do Both](#cleaning-versus-sanitizing-and-how-to-do-both)
- [What the clean-then-sanitize step really does](#what-the-clean-then-sanitize-step-really-does)
- [What to use and what to avoid](#what-to-use-and-what-to-avoid)
- [A practical decision rule](#a-practical-decision-rule)
- [Deodorizing That Survives the Next Grocery Run](#deodorizing-that-survives-the-next-grocery-run)
- [Start with a diagnosis, not a cover-up](#start-with-a-diagnosis-not-a-cover-up)
- [Use odor tools after the fridge is clean](#use-odor-tools-after-the-fridge-is-clean)
- [Smart Organization for Faster Cleanups Later](#smart-organization-for-faster-cleanups-later)
- [Put food where it belongs](#put-food-where-it-belongs)
- [Make the next cleaning easier](#make-the-next-cleaning-easier)
- [Keep the rhythm simple](#keep-the-rhythm-simple)
- [When to Hand the Fridge Off and How to Keep It That Way](#when-to-hand-the-fridge-off-and-how-to-keep-it-that-way)
<a id="why-a-wipe-down-is-not-a-deep-clean"></a>
Why a Wipe Down Is Not a Deep Clean
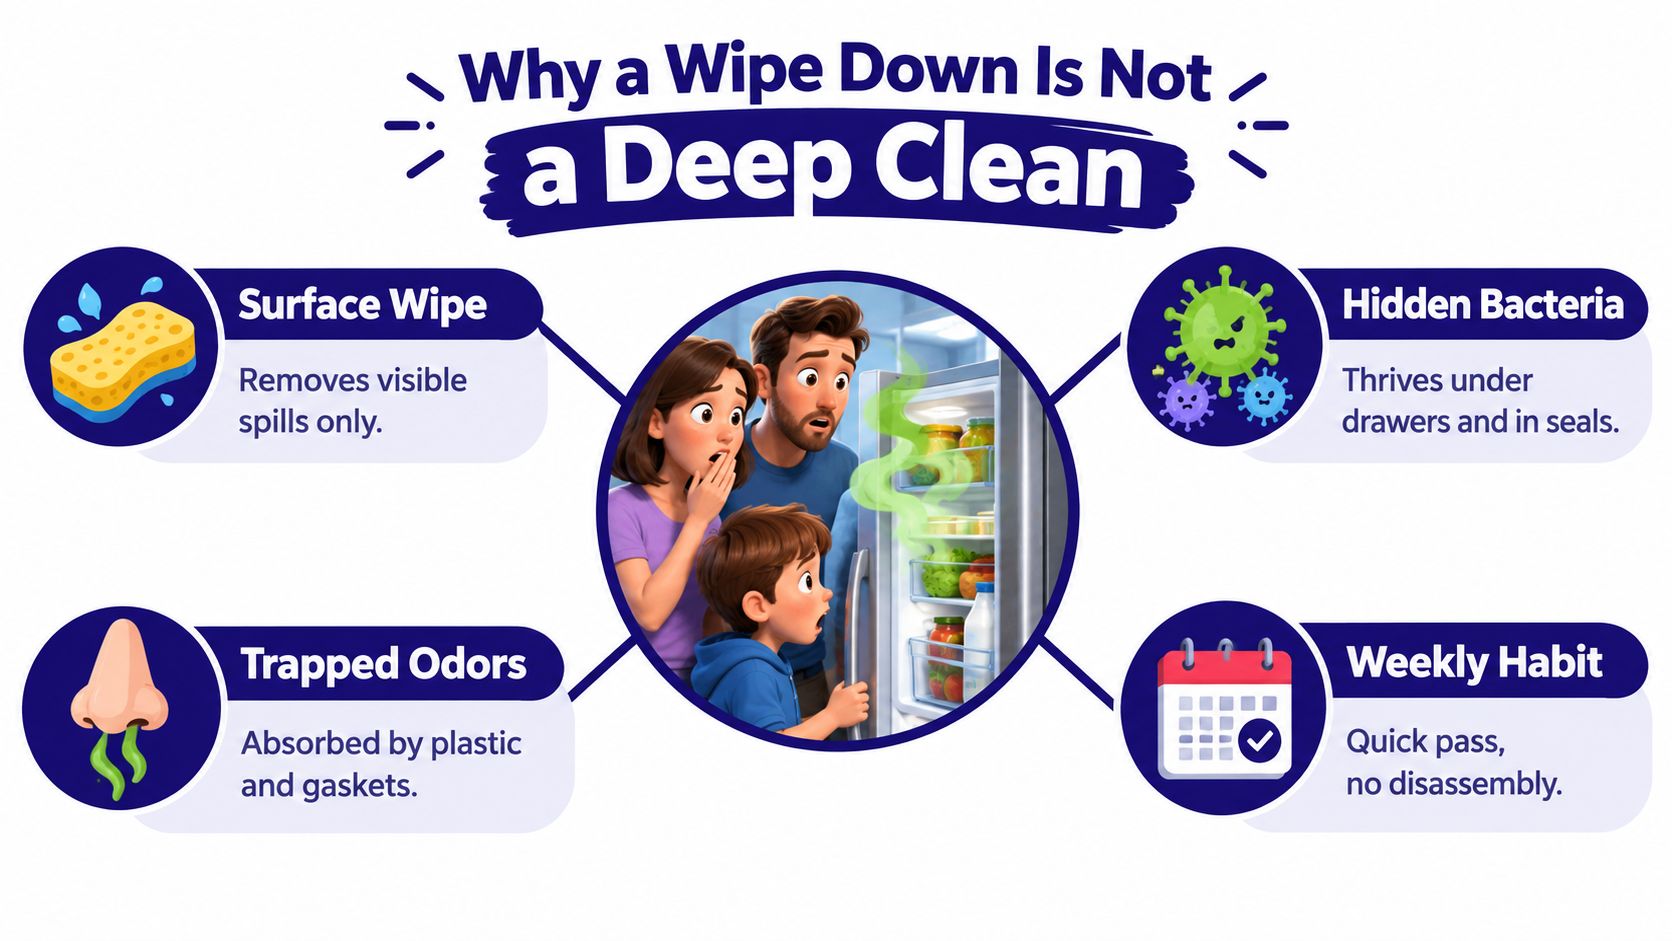
A quick pass with a damp cloth can make a refrigerator look better fast, but looks don't tell you what's happening under the drawers, in the gasket folds, or around the drip channels. In a family kitchen, that's where the mess hides. Food residue, moisture, and raw juices can sit where a casual wipe never reaches, then spread odor and contamination back onto clean food.
<a id="what-deep-clean-really-means"></a>
What deep clean really means
A deep clean starts with disassembly, because shelves, drawers, bins, and ice trays can't be cleaned properly while they're still packed into the cabinet. It also means hand-washing removable parts, drying them fully, and paying attention to glass pieces that can crack if cold material hits hot water too fast. CDC guidance says cold glass shelves and drawers should warm to room temperature first to reduce thermal shock, and the refrigerator shouldn't sit open with perishable food outside refrigeration for more than 2 hours while you work, so a cooler matters if you're moving a lot of food around. CDC refrigerator cleaning guidance
Practical rule: If you didn't remove the food, wash the parts, rinse away residue, and sanitize the surfaces, you didn't deep clean it.
The difference between deodorizing and sanitizing matters here. Deodorizing may improve the smell, but sanitizing is about reducing pathogens on food-contact surfaces after they've been cleaned. That's why a fridge can smell less offensive and still be unsafe if spills, seals, and hidden surfaces were never treated correctly.
<a id="what-professional-cleaners-are-actually-checking"></a>
What professional cleaners are actually checking
The job isn't just the shelves you can see. It's the gasket folds, the handles, the drain area, the underside of drawers, and the spots where drips harden and sit unnoticed. It's also the temperature reading, because a clean-looking refrigerator that runs warm is still a problem.
That's why many families who book a deep cleaning visit end up surprised by how much of the work is prep, not scrubbing. The detail that changes the result is not the fragrance, it's the sequence.
<a id="gather-what-you-need-before-you-start"></a>
Gather What You Need Before You Start
A fridge deep clean goes faster when the supplies are ready before the door opens. Once you start chasing a sponge while butter, leftovers, and produce are sitting out, the job slows down and the food stays exposed longer than it should.
<a id="build-a-small-separate-kit"></a>
Build a small, separate kit
Keep one bucket or bin for wash supplies and a separate, clearly marked container for sanitizer. That simple split keeps the work organized and helps prevent cross-contamination. An appliance thermometer belongs in the kit too, because the only safe way to know the refrigerator is holding temperature is to check it directly, not guess from the dial.
| Deep-Clean Refrigerator Supply Checklist | Why You Need It |
|---|---|
| Cooler or secondary fridge | Keeps perishables cold while you work |
| Soft microfiber cloths | Lifts residue without scratching finishes |
| Non-abrasive brush | Reaches seams, rails, and corners |
| Cotton swabs | Cleans gasket grooves and tight folds |
| Mild dish soap | Handles routine soil and sticky film |
| Baking soda | Helps with odor control during interior cleaning |
| Unscented liquid chlorine bleach | Used for food-contact sanitizing when labeled for that purpose |
| Spray bottle | Makes application even and controlled |
| Labeled sanitizer bucket | Keeps the rinse and sanitize steps separate |
| Appliance thermometer | Verifies fridge and freezer temperature |
<a id="use-the-right-chemicals-not-the-strongest-ones"></a>
Use the right chemicals, not the strongest ones
Unscented bleach matters because food-contact surfaces do not need perfume or extra additives. The goal is correct sanitation, not a stronger smell. Solvent cleaners and abrasive products are a poor fit for food-contact surfaces because they can leave residue, fumes, or scratches where food and ice sit. USDA specifically warns against those products and recommends cleaning spills promptly with warm, soapy water followed by rinsing. USDA refrigerator odor and cleaning guidance
A vented room makes the work safer and easier, especially if you are using any chlorine product. Keep the room ventilated and don't mix bleach with ammonia, vinegar, or other cleaners.
For families trying to keep a busy kitchen steady between bigger resets, a recurring service can be the cleanest handoff. J&M Cleaning Team lists refrigerator deep cleans as an add-on alongside other detailed tasks, so the fridge can be scheduled instead of treated like an emergency.
<a id="the-four-stage-cleaning-sequence"></a>
The Four-Stage Cleaning Sequence
A refrigerator deep clean works best when you treat it as sanitation work, not a quick wipe-down. Around family kitchens in Central Florida, the difference shows up fast, especially in sticky drawers, warm door shelves, and gasket seams where food residue lingers. The order matters because each stage prepares the next one. If you jump straight to sanitizer before removing soil, you trap grime and weaken the cleaner's effect.
<a id="step-1-remove-and-sort"></a>
Step 1 Remove and sort
Empty the fridge completely. Toss spoiled, questionable, or long-forgotten food right away, then move the rest into a cooler or another refrigerator so perishables stay safe while you work. That also gives you a clear view of spills, leaks, and problem spots.
Pull out shelves, drawers, bins, and ice trays if they come free without forcing them. Rushing this part usually means scrubbing around the same sticky edges later, which takes longer and leaves more residue behind.
<a id="step-2-wash-the-parts"></a>
Step 2 Wash the parts
Wash removable parts by hand with hot, soapy water. Let cold glass warm to room temperature before it touches hot water, or it can crack from thermal shock. That simple pause can save a shelf from a preventable break.
Clean the interior walls, ceiling, door surfaces, handles, gasket folds, and drain areas with detergent solution. Use a soft brush or cotton swab for seams and gasket grooves, where crumbs and spills tend to hide. The basic sanitation order stays the same, remove food residue, wash with detergent, then rinse and sanitize. Penn State refrigerator refresher
<a id="step-3-rinse-away-the-detergent"></a>
Step 3 Rinse away the detergent
This is the step many DIY cleanups skip. Detergent left behind can interfere with sanitizer performance, so a surface that still feels slick is not ready for the next stage.
Rinse all food-contact surfaces with clean water after washing. Make sure removable parts no longer have soap film before you move on. If the surface still feels slippery, rinse it again.
<a id="step-4-sanitize-and-dry"></a>
Step 4 Sanitize and dry
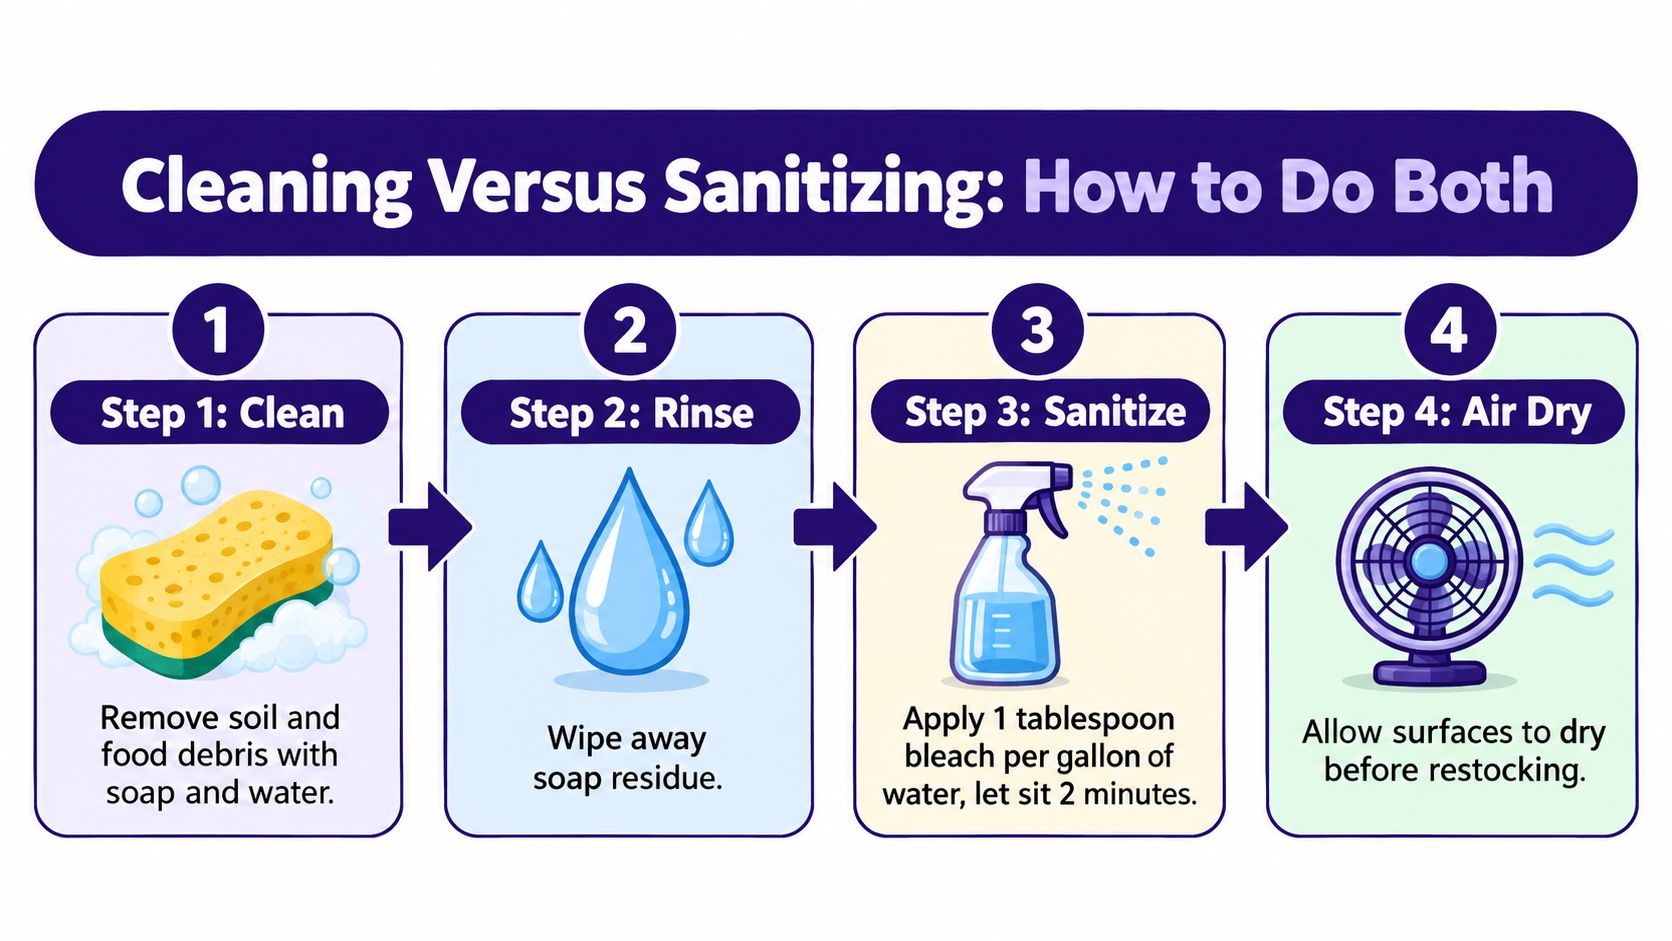
Once the surfaces are clean and rinsed, apply a food-safe sanitizer and keep it wet for the label's contact time. For sanitizing after refrigerator cleaning, the CDC and Penn State Extension both recommend 1 tablespoon of unscented liquid chlorine bleach per gallon of water, with the product label taking priority. Penn State Extension also lists 1/4 teaspoon bleach per 2 cups of warm water for removable parts. CDC refrigerator cleaning guidance
Let everything air-dry completely before reassembly. Leave the door open briefly so moisture can clear out. Damp surfaces bring smells back faster and give buildup an easier start the next time the fridge gets used hard.
<a id="cleaning-versus-sanitizing-and-how-to-do-both"></a>
Cleaning Versus Sanitizing and How to Do Both
A fridge can look clean and still leave food sitting on a dirty, lightly contaminated surface. That matters after raw meat leaks, sticky juice spills, or any mess that has had time to warm up between door openings. Cleaning removes the soil. Sanitizing reduces the microbes left on a clean food-contact surface.
<a id="what-the-clean-then-sanitize-step-really-does"></a>
What the clean-then-sanitize step really does
The order is simple, remove debris, wash, rinse, sanitize. That sequence matters because sanitizer works on a clean surface, not on grease, sugar, or food film. The cleaner the surface, the more evenly the sanitizer can do its job.
Label instructions matter here. Some products need a full wet contact period before they work the way they should, and some call for a final potable-water rinse afterward. Read the label every time, because bleach mixes and ready-to-use sanitizers are not the same. A fast spray-and-wipe can leave too much residue on the shelf and too little time for the sanitizer to matter. Purdue Extension refrigerator refresher
Practical rule: If the spill involved raw meat or seafood, clean and rinse first, then sanitize. If it happened during a renovation or a dusty reset, our post-construction cleaning in Orlando guide covers the bigger cleanup around it.
<a id="what-to-use-and-what-to-avoid"></a>
What to use and what to avoid
Routine spills usually need warm soapy water, a rinse, and drying. That is enough for milk drips, condiment smears, and other everyday messes. Raw-meat or seafood leaks deserve a food-safe sanitizer after the surface has been cleaned and rinsed.
Do not mix bleach with ammonia, vinegar, acids, or other cleaners. Do not use solvent cleaners or abrasives on food-contact surfaces, either. Fumes, tastes, and scratches can all end up where food is stored. If you use concentrated bleach, measure it carefully. Too much can leave residue and damage finishes, too little will not give you the sanitation you are trying to get.
<a id="a-practical-decision-rule"></a>
A practical decision rule
Use the spill itself to decide the response.
- Routine spill: wash with warm, soapy water, rinse, dry.
- Raw-meat or seafood spill: wash, rinse, then sanitize with a food-safe bleach solution.
- Unknown sticky residue: treat it like a food-contact cleanup, not a scent problem.
That split keeps the work focused. It also keeps you from treating every fridge mess the same way, which is where a lot of DIY cleanups go sideways.
<a id="deodorizing-that-survives-the-next-grocery-run"></a>
Deodorizing That Survives the Next Grocery Run
A refrigerator that smells bad usually has one of three causes, old food, residue trapped in seams, or moisture that keeps feeding mold and musty odors. Spoiled food has to go. Hidden buildup has to be washed out. A smell that keeps returning usually means something inside the fridge is still dirty or damp, not that it needs a stronger air freshener.
<a id="start-with-a-diagnosis-not-a-cover-up"></a>
Start with a diagnosis, not a cover-up
| Refrigerator Smell | Likely Cause | First Check |
|---|---|---|
| Sour milk | Old dairy or spoiled leftovers | Check the dairy shelf and door bins |
| Fishy odor | Seafood residue or leakage | Inspect the lower shelf and any sealed packaging |
| Mustiness | Moisture in seals, drawers, or hidden spills | Look at gasket folds and crisper rails |
That table matters because odor often settles where grime hides. Door gaskets, drawer rails, crisper bins, and ice trays can hold onto residue long after the obvious shelves look clean. USDA's odor-removal guidance covers those problem spots too, with removable parts washed first, then the interior and seals cleaned, then the surfaces rinsed and sanitized with a bleach solution. USDA refrigerator odor and cleaning guidance
Visible mold deserves a hard line. Mold can grow in cold spaces, and food that is moldy should be thrown out. Trimming off the bad spot and keeping the rest is a bad gamble, especially in a family fridge where the same air moves over everything.
<a id="use-odor-tools-after-the-fridge-is-clean"></a>
Use odor tools after the fridge is clean
An open box of baking soda can help absorb odor if it sits where air can move around it. A sealed box buried in the back will not do much. If a smell lingers after a full clean, activated charcoal or a tray of fresh coffee grounds can help with odor absorption too, but they only support a clean fridge. They do not fix grime, moisture, or spoiled residue.
Baking soda helps after the fridge is clean. It does not rescue a dirty gasket or a moldy drawer.
A smell that comes back fast usually points to a hidden pocket of residue or dampness. That is the problem to find.
<a id="smart-organization-for-faster-cleanups-later"></a>
Smart Organization for Faster Cleanups Later
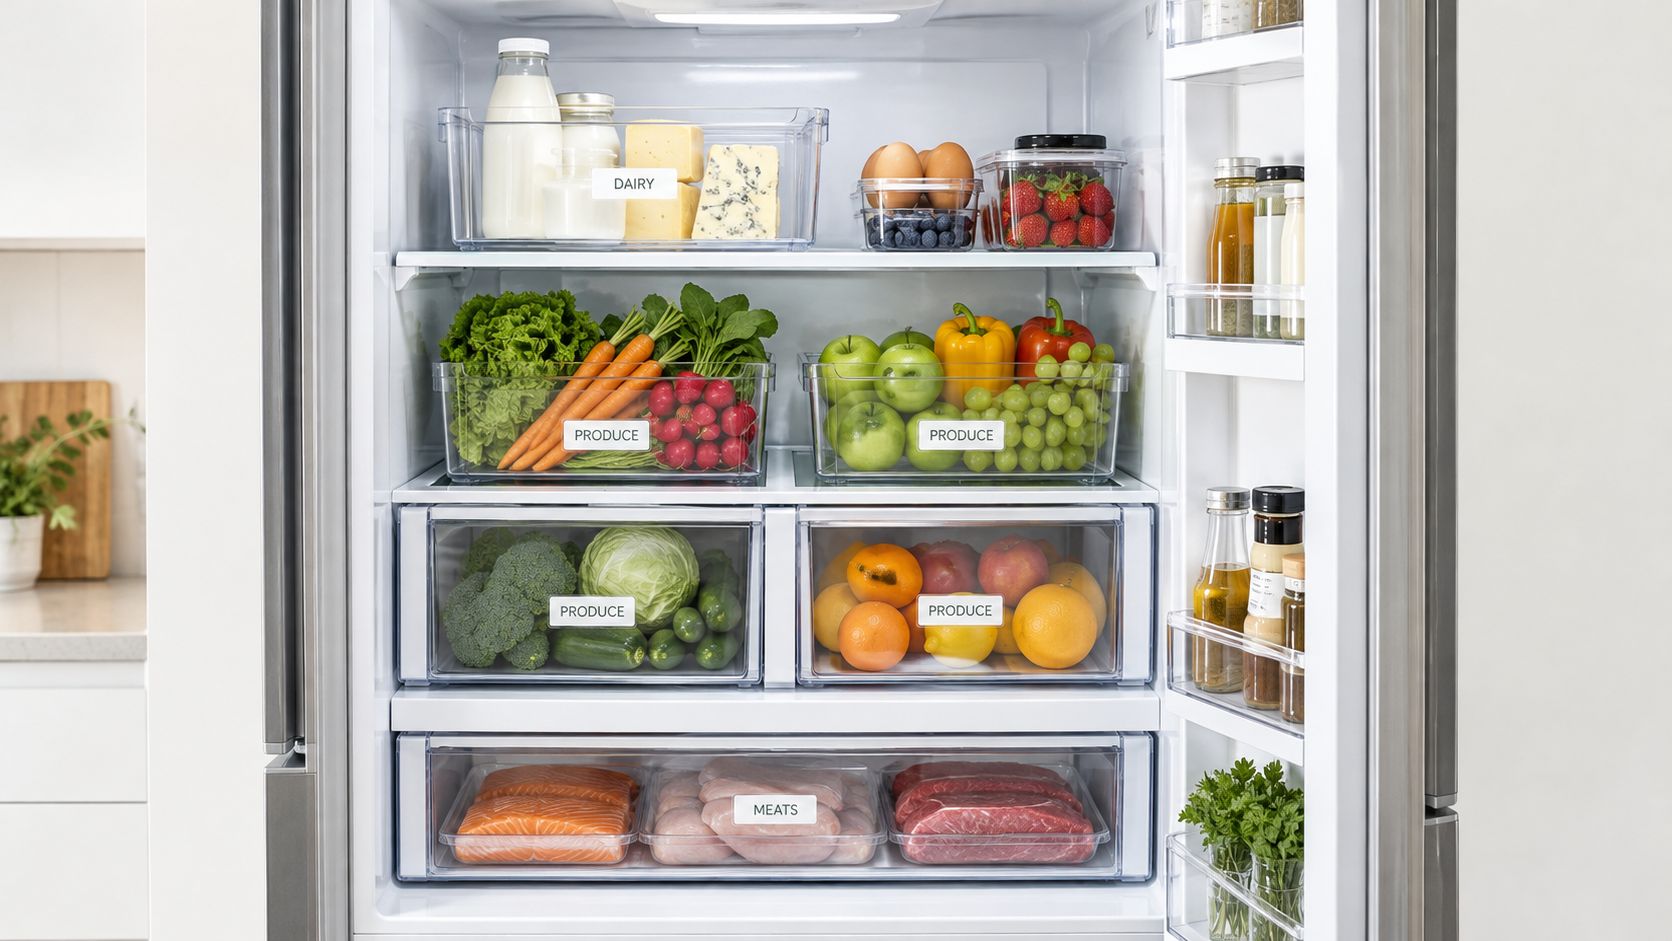
A clean refrigerator stays easier to manage when the food goes back in with a little structure. The goal isn't perfect magazine styling. It's making spills easier to spot, making food safer to store, and making the next cleanup quicker.
<a id="put-food-where-it-belongs"></a>
Put food where it belongs
Keep condiments in the door, since that space sees the most temperature swings anyway. Use middle shelves for dairy and ready-to-eat food. Raw meat belongs on a lower shelf in sealed containers so drips don't land on other food. Crispers should hold produce, not random leftovers that never get used.
FIFO, first-in, first-out, helps too. Put older leftovers and opened items in front so they get used before newer ones. Clear, stackable bins help because one bin can come out, get washed, and go back without unloading half the fridge.
<a id="make-the-next-cleaning-easier"></a>
Make the next cleaning easier
Label leftovers with a date, and keep the labels where you can read them without moving three other containers. If you have a busy household, use bins by category, dairy, snacks, produce, leftovers, so everyone knows where things go back. The less hunting people do, the fewer spills and drips end up under the drawers.
The layout also helps with temperature control. When food is grouped logically, you spend less time with the door open and less time guessing where something got pushed.
<iframe width="100%" style="aspect-ratio: 16 / 9;" src="https://www.youtube.com/embed/XRpDllJv24Y" frameborder="0" allow="autoplay; encrypted-media" allowfullscreen></iframe>
A quick visual reset like this is useful after a full clean, especially if the household has a habit of stacking new groceries in front of older food. The setup doesn't need to be fancy, just consistent.
<a id="keep-the-rhythm-simple"></a>
Keep the rhythm simple
Wipe spills immediately. Do a quick weekly pass so residue doesn't harden. Then schedule a full reset every few months, or sooner in a humid kitchen where condensation and sticky buildup happen faster. That cadence keeps the fridge from turning into a long weekend project every time you open it.
<a id="when-to-hand-the-fridge-off-and-how-to-keep-it-that-way"></a>
When to Hand the Fridge Off and How to Keep It That Way
A full refrigerator deep clean takes real time once you factor in remove, wash, rinse, and sanitize, plus the drying and restocking that follow. In a busy family kitchen, that job often gets pushed until odor, sticky residue, or spoiled items make the call for you. Hand it off sooner when the kitchen is already under strain, after renovations, during a move, or when the fridge has gone too long between resets.
This move-out cleaning checklist for renters helps when the fridge clean sits inside a larger turnover or deposit-sensitive cleanup. That is the point where a recurring service or an add-on deep clean saves you from patching the job together at the last minute.
J&M Cleaning Team lists refrigerator deep cleans as an add-on task alongside oven interiors, interior windows, and baseboard detailing. Their recurring maid service visits start from $187 per visit, and refrigerator deep cleans can be added to any plan.
The right rhythm stays simple: wipe spills as they happen, keep food organized, and do not let the deep clean slip for months. In Central Florida, humidity and daily traffic speed up residue and temperature stress inside the fridge, so small delays matter. If the appliance is already overdue, book the reset, then keep it in shape with steady habits and a schedule you can maintain.